
Saturday, 29 December 2012
The Crocheted Scarf has Morphed
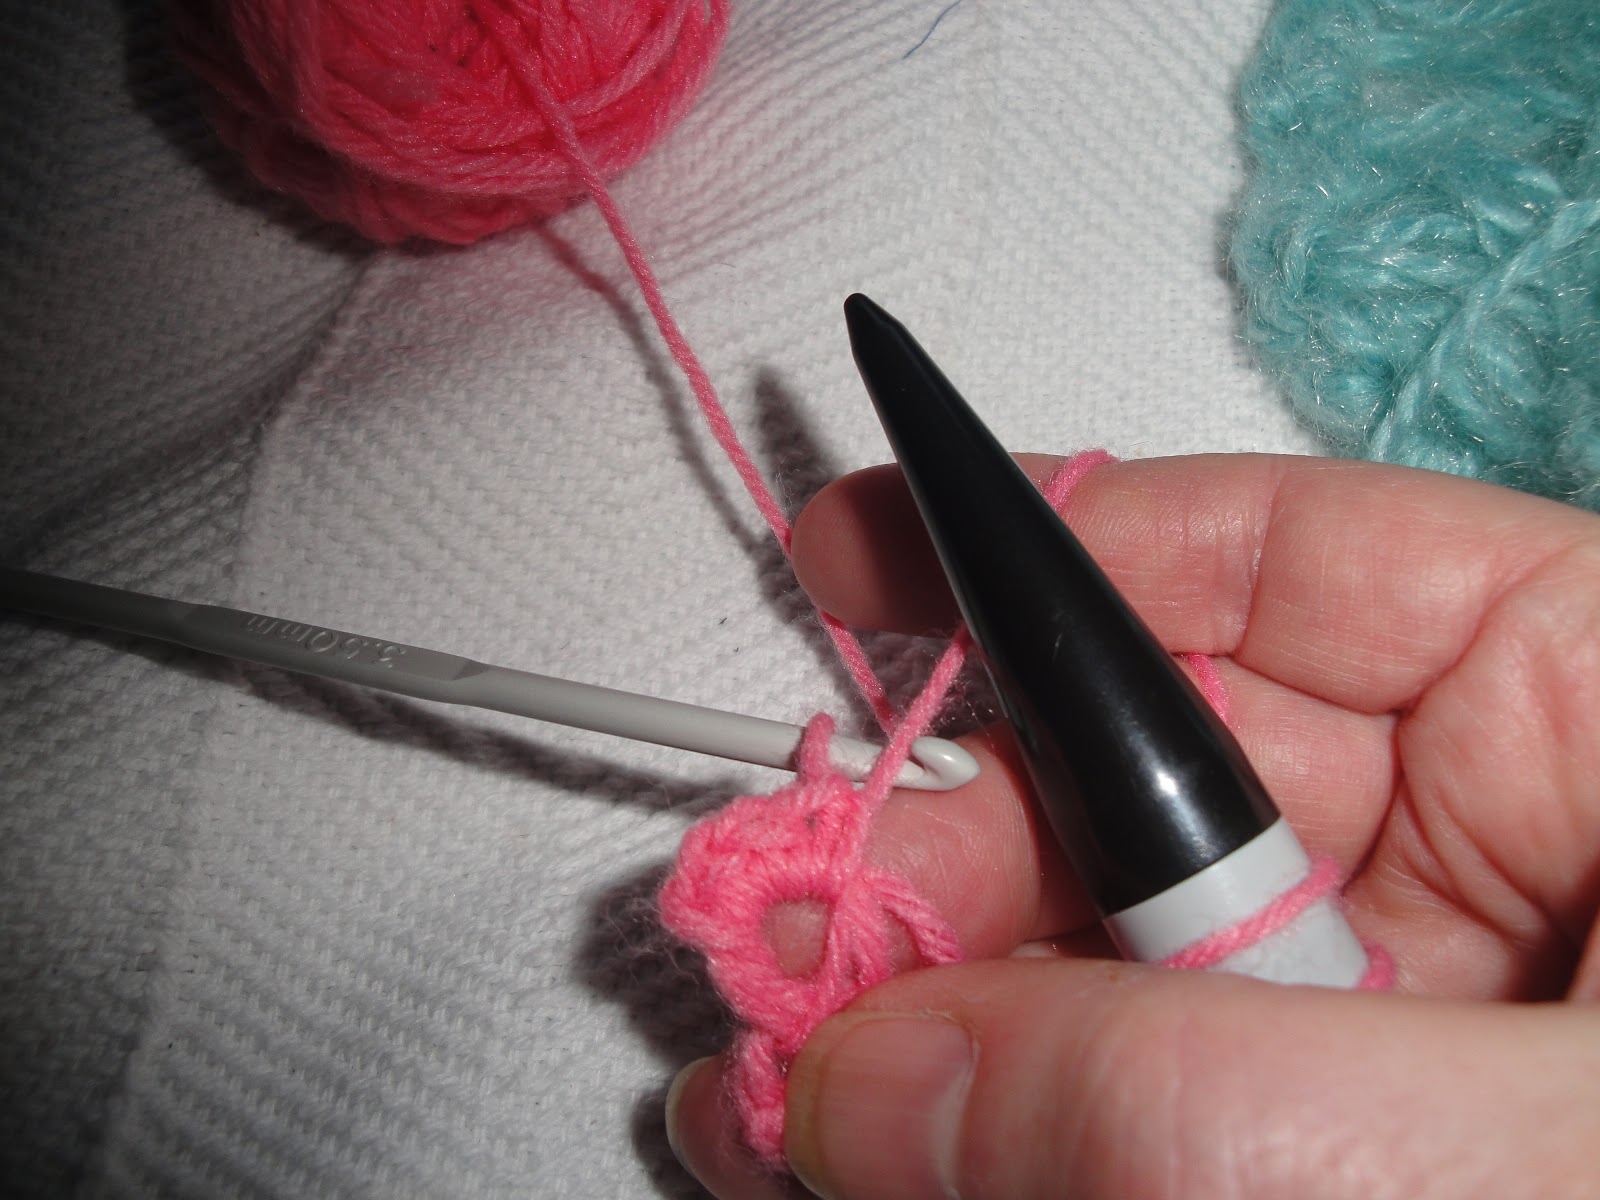
Thursday, 27 December 2012
Crocheted Scarf from a Knit Kit.

It kept coming off the back of the needles and I just couldn’t see what I was doing, so in the end I frogged it and made a scarf on a huge crochet hook - a 20mm, I think.
I made about 20 chain (I wasn’t counting), went into 4th ch from hook, worked a Double Treble (UK, wrap twice) into every other one, ending up with 8 DTR. I just worked rows after that. Putting a gap between the sts in the first row meant it didn’t bunch up. I just couldn’t do the chain loose enough otherwise. Every other row was worked straight.


I'm not complaining - I never complain about yarny gifts.
Friday, 21 December 2012
A Jewellery Holder - After a Fashion
 |
Take one cork mat - courtesy of Clas Ohlson. Work a number of chain, slip stitch join, then 3 ch for your first treble (US DC).


Was it worth it? Not sure... I did think of poking the brooches directly into the cork, but I think that would have damaged them.
Wednesday, 19 December 2012
Travelling Nostepinne

They make great nostepinnes (yarn winders), are lightweight with some storage, too. I can put darning needles, beads, stitch markers etc inside, and the dessicant gizmo in the cap helps keep things dry.
When I'm winding, the closed cap can hold on to the tip of the yarn end, making centre-pull that much easier.
Love it.
Wednesday, 5 December 2012
The Broomstick How-To - Left-Handed...
 |
| Five loops (top), and three loops. See the difference? |
Broomstick crochet has many uses - as well as scarves, shawls, bags and blankets, it can form a panel in the middle of a project, or one row alone could be used as a bracelet.

Chain your required number, plus one. How many do you need? First, decide how many loops are going in each group. Three, four or five is the usual, but there's nothing to stop you doing any other number, as long as it works for you and the look you want.
Say we are going to go for three loops. I would want a multiple of three, plus one. The 'one' is for the first DC (US SC). I have worked 16 ch here - which means, if I want to, I can do five in each loop,

Turn, and work back in DC. You should have fifteen sts.


There it is. Needs to slide a bit further on to the needle.

Put your hook into the next stitch, and bring up another loop.

Pull...

Slide on to the needle...

...and again...

...all done.

I've grouped them into three, with my fingers, just sliding them along.

If you're feeling bold, you can take the needle out altogether for the next step... but if you're not confident yet, or may have to leave your work, then leave 'em on the needle.


There's our three.

Same with the next group.


All the way to the end, and here's your loop pulled up ready to put on the needle. Just remember to keep your count right.
Which Broomstick?
Broomstick crochet was originally worked using a broom handle. Nowadays a large knitting needle is often used - I've used an old 'fizzy vitamin' tube with good results.
It works up quickly and is warm (think 'air pockets'), and you don't have to flip the work over at the end of each row.
It's also versatile - you can change the look with different yarns, needle sizes and number of loops in each group.
 |
| A little pouch in the making |
 |
| A loop is drawn up in the usual way, but... |
 |
| ... it's placed on the needle... |
 |
| ... and gently tightened, as if you were going to knit. In this example, the needle is comparatively small, at 15 mm, and there are five loops in each group, giving a chunky look. |
 |
| Here I've used my vitamin tube, with five loops (the pink) and three (the turquoise). You should be able to see the difference - both sides are shown, too. |
Tuesday, 4 December 2012
Bi-Crafted Boot Toppers

These were simple to do, and give a nice 'top' to a pair of boots. A bit OTT for me, though - so I might just frog 'em.

See how they have definition at the top? A kind of crease? Easy done, details further down.

The 'crease' stays put...
OK, so how are they done? Briefly, I started off with a 5 mm crochet hook, and some acrylic Aran yarn.
I worked 48 chain (this is just a guide, you might have better legs than I do), then turned and worked back in DC (US SC), joining in a circle with a slip st and continuing round - I didn't join subsequent rows, but spiralled around.
After about 6 rounds, I worked a round of FPDC. This had the effect of making that neat crease, or ridge, at the top.
Next, I took a pair of 5 mm circular knitting needles and picked up all round, and worked about 10 rows in K2 P2 rib.
Had my circ's been flexible enough I would have worked in rounds a la magic loop, but they were a tad stiff so I ended up working flat, casting off loosely, and seaming at the end.
Subscribe to:
Posts (Atom)